Vapor smoothing with acetone is fastest for ABS. Epoxy coatings work quickly for PLA. Both fill layer lines effectively without extensive manual labor.
Post-Processing Techniques Used to Enhance 3D Printed Parts
POST BY
PUBLISHED
May, 21, 2026
You might have noticed that the 3D print usually feels unfinished the moment it leaves the printer. Earlier, it looked perfect in the device, but didn’t come out as it was seen. Actually, it does! A smart post-processing process makes it possible.
From techniques like polishing, painting and coating, rough prints can be transformed into clean, clear and ready-to-use. Whether it is for educational use, professional use or as a hobbyist, post-processing techniques truly improve the 3D print parts.
Keep reading to better understand how post-processing techniques are used to enhance 3D printed parts.
Key Takeaways
- Post-processing is a process that effectively improves both the appearance and functionality of 3D printing parts.
- Different materials demand different finishing approaches and handling methods for accuracy.
- Good post-processing usually affects whether a print will give a professional feel or an average one.
Why Post-Processing Deserves More of Your Attention
Here’s a factor a lot of people ignore: post-processing isn’t purely decorative. Done right, it quickly impacts a part’s mechanical strength, dimensional precision, and real-world usability. Skip it, and you’re often settling for something that legally exists but practically falls thin.
San Francisco sits at a unique center of tech-forward thinking and precision output demand, where methods like plastic thermoforming and multi-step manufacturing are often used side by side, looking on the product specs.
One more thing worth noting early: your finishing plan depends strongly on print technology and material. What converts an ABS part beautifully can surely destroy a costly resin print. Context matters here.
The Workflow Foundation: Getting the Basics Right
Discipline in the early stages prevents serious problems later. Post-processing is ordered; cut corners upfront, and you’ll pay for it twice.
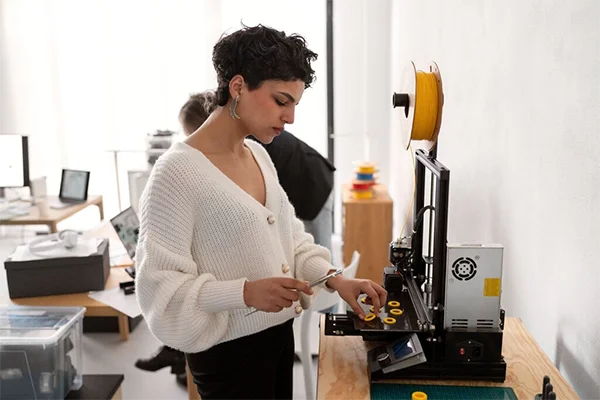
Support Removal and Initial Cleaning
FDM supports can be manually taken away or dissolved using soluble materials like PVA or HIPS. SLA and DLP parts need flush cutters, an isopropyl alcohol wash, and UV post-curing to fully fuse the resin. Don’t speed the fix; undertreated resin parts are brittle in ways that aren’t easily visible.
SLS and MJF parts trap fine powder inside every hole and crevice. Bead blasting, forced air, and ultrasonic cleaning all work here. Often, you need more than one strategy.
Quick tip: Orienting your model during slicing to reduce support contact points saves vital cleanup time later. It’s one of those initial decisions that pays dividends afterward.
Thorough Debris Removal for Complex Geometries
Internal channels and fine features need more than manual cleaning. Solvent baths and delicate water-jetting reach areas that hands simply can’t. Ultrasonic cleaning baths are more effective; they locate complex geometries without physical access.
Surface Refinement: Where Real Quality Gets Built
Clean part in hand, this is where the makeover happens. Surface polish defines how a part looks, feels under touch, and holds up under actual use.
Sanding and Polishing Done Properly
Sanding 3D printed parts remains one of the most robust refinement methods available. Beginning at 80-grit and working steadily through to 2000-grit, unified wet sanding stages, can produce near-mirror finishes on polymer parts. It takes patience, but the results support it.
For batch production, automated vibratory tumbling offers uniform results across hundreds of parts without human fatigue becoming a factor. Material matters here, too. ABS is easy to remove under the abrasive. PLA chips if you hit too hard, too fast.
Vapor Smoothing and Chemical Smoothing
Vapor shaping 3D prints changes everything for ABS. Controlled acetone vapor nearly melts the outer surface layer, rid of visible layer lines and sealing micro-pores. Timing controls gloss level, a few seconds too long, and you’ve gone from matte to glittery without meaning to.
For nylon parts from SLS or MJF processes, branded chemical solvents achieve very similar results. And this isn’t just about looks, either; chemical smoothing actually increases surface density and part strength. That’s a practical benefit, not just an elegant one.
Annealing for Dimensional Stability
3D print annealing mitigates internal stress gathered during printing. The result is extra density and better long-term dimensional health. The trade-off is real, though, parts can slide during the process. Always anneal before final precision finishing or machining, never after.
Test on sample parts first. Giving a full production batch to an annealing cycle without verifying the final results first is an expense lesson.
Functional Enhancements That Go Beyond Looks
Automated post-processing systems can lower technician labor per cycle by 85%, saving up to 14 technician hours weekly. That’s not a temporary boost, that’s a structural output gain that basically changes what’s possible at production scale.
Filling, Coating, and Sealing
Epoxy fillers and body primers fix surface gaps and prepare parts for protective coats. Specialty coatings can then layer on wear preservation, UV protection, or a strictly controlled surface gloss, depending exactly on what the application calls for.
Structural Reinforcement Options
Resin infiltration fills micro-voids all around a part’s internal structure, measurably improving mechanical quality. Electroplating goes further, wrapping a plastic print in a porous metal shell that rapidly increases surface hardness and support capacity. It’s quite strange what a thin metal layer does to a part’s imagined quality and real-world strength.
Industrial-Grade Options: Electropolishing and HIP
Metal AM parts benefit greatly from electropolishing. It erases microscopic surface peaks, altering wear resistance and surface finish in one step. Hot Isostatic Pressing, HIP, destroys internal porosity totally. That’s the benchmark for aerospace and medical-grade parts, and it is present for good reason.
Design Smarter to Reduce Finishing Work
Finer layer heights cut surface revision effort nearly in half. Low-porosity materials selected for smoothing make downstream processing more reliable. The proper model alignment during slicing lessens support contact, and by extension, the finishing work that comes afterwards. These are upstream savings that shield your time downstream.
The Bottom Line on Post-Processing
Post-processing is the technique that is used to join the two disparate endings of a raw 3D print and a polished final product. Even as printers get better, using finish methods helps boost how long things last, work well, and feel complete. Though tech moves forward slowly, adding surface touches makes a real difference in strength and function
Out of nowhere, 3D printing began showing up everywhere – from clinics to factories – making what happens after printing matter just as much as the print job. That’s when smoothing out rough edges started gaining ground, simply because bumpy surfaces rarely fit right.
Frequently Asked Questions
1. What’s the fastest way to smooth FDM prints without sanding?
2. Does annealing change part dimensions?
Yes. Polymers typically experience slight shrinkage or warping. Metal parts are more stable, but still shift. Always anneal before final precision finishing.
3. Can electroplating work on consumer-grade PLA?
It can, with proper surface prep. PLA needs a conductive base coat first. Results are functional for decorative or light structural use, though not equivalent to industrial-grade electroplating on engineered resins.
Related Posts